Embark on a culinary journey to master the perfect prime rib with the renowned Chef John Prime Rib Recipe. This comprehensive guide details his famous reverse-sear method, ensuring an incredibly tender interior and a beautifully caramelized, savory crust. Discover insider tips for selecting the best cut, preparing an irresistible herb rub, and achieving precise doneness for a show-stopping meal that will impress everyone.
Ah, the prime rib. Just the mention of it conjures images of festive gatherings, impressive holiday meals, and the ultimate culinary indulgence. It’s a dish that commands respect, a centerpiece that promises tender, juicy perfection with every slice. But let’s be honest, cooking a prime rib can feel a little intimidating, right? The stakes are high, the cut of meat is often expensive, and nobody wants to serve a dry, overcooked roast.
Fear not, my friends! Today, we’re diving deep into the world-famous Chef John Prime Rib Recipe. Chef John, from Food Wishes, has a knack for demystifying complex dishes and turning them into accessible, foolproof triumphs. His approach to prime rib is nothing short of revolutionary for home cooks, guaranteeing rave reviews and a perfectly cooked roast every single time. Get ready to elevate your cooking game and become the prime rib hero you were always meant to be!
Why Chef John’s Method Stands Out
Chef John’s brilliance lies in his embrace of the “reverse sear” technique for prime rib. Unlike traditional methods that blast the roast with high heat initially, his recipe starts low and slow. This gentle cooking ensures an incredibly even doneness throughout the meat, preventing that dreaded gray band around the edges. Then, at the very end, a quick blast of high heat creates an irresistible, deeply browned, and savory crust. It’s a game-changer, and once you try this Chef John Prime Rib Recipe, you’ll never go back.
Key Takeaways
- Understanding the Reverse Sear: Chef John’s method prioritizes low-temperature cooking followed by a high-heat sear, ensuring an even medium-rare from edge to edge with a delicious crust.
- Importance of Internal Temperature: Relying on a reliable meat thermometer is crucial. Remove the roast about 5-10 degrees F below your desired final doneness, as it will continue to cook during resting.
- Don’t Skip the Dry Brine: Salting the prime rib generously 24-48 hours in advance draws out moisture, concentrates flavor, and helps achieve a crispier exterior.
- Resting is Non-Negotiable: After cooking, allowing the prime rib to rest for at least 30-45 minutes redistributes juices, resulting in a more tender and flavorful roast.
- The Power of a Flavorful Rub: A simple yet potent rub of fresh herbs, garlic, and spices contributes significantly to the prime rib’s iconic taste and texture.
- Bone-In vs. Boneless: While boneless is easier to carve, bone-in prime rib offers superior flavor and moisture retention, making it a preferred choice for many.
Quick Answers to Common Questions
What is the biggest mistake people make when cooking prime rib?
The biggest mistake is usually overcooking the prime rib, often due to not using a reliable meat thermometer or not allowing for proper resting time. This leads to dry, tough meat.
Can I prepare the rub in advance for Chef John’s Prime Rib Recipe?
Yes, you can mix the dry components of the rub (herbs, pepper) a few days in advance. It’s best to add fresh garlic and olive oil/Dijon just before applying to the prime rib for the freshest flavor.
Do I need to sear the prime rib before the low-temperature cooking?
No, Chef John’s reverse sear method specifically starts with low-temperature roasting and finishes with a high-heat sear. Searing first can create a gray band and uneven cooking.
How long does it take to cook a prime rib using this method?
Cooking time varies significantly by size. A good estimate is about 20-30 minutes per pound for the low-and-slow portion, but always go by internal temperature, not time.
Is it okay to open the oven frequently to check on the prime rib?
It’s best to avoid opening the oven too often, especially during the low-and-slow phase, as it causes temperature fluctuations. Rely on your leave-in probe thermometer for monitoring.
📑 Table of Contents
Choosing Your Perfect Prime Rib: The Foundation of Success
Before we even think about rubs or oven temperatures, the journey to a perfect prime rib begins at the butcher’s counter. Selecting the right cut is paramount, and understanding your options will set you up for success with the Chef John Prime Rib Recipe.
Bone-In vs. Boneless: A Timeless Debate
When it comes to prime rib, you’ll typically find two main options: bone-in or boneless.
- Bone-In: This is often considered the connoisseur’s choice. The bones act as natural insulation, helping the roast cook more evenly and retaining moisture. They also add incredible flavor to the meat. The downside? Carving can be a bit more challenging.
- Boneless: Easier to carve, and often more uniform in shape. If you choose boneless, make sure it’s tied securely by your butcher (or yourself) to maintain its shape during cooking. While it might lose a tiny bit of flavor compared to bone-in, a well-prepared boneless prime rib is still spectacular.
For the ultimate Chef John Prime Rib Recipe experience, I highly recommend going with a bone-in roast, if possible. The flavor payoff is truly worth the extra carving effort.
Understanding Rib Sections and Grades
Prime rib comes from the rib primal of the cow, specifically ribs 6 through 12.
- First Cut (Chuck End): Ribs 6-9. This section has more of the larger ribeye muscle and less fat. It’s often preferred for its tenderness.
- Second Cut (Loin End): Ribs 10-12. This section has a bit more fat and marbling, which can lead to incredible juiciness.
Either section works wonderfully for the Chef John Prime Rib Recipe. When it comes to grades, always aim for USDA Prime or Choice. Prime will have the most marbling (intramuscular fat), leading to a more tender and flavorful result, but Choice is an excellent, more readily available option. Skip “Select” grade for prime rib; it tends to be less marbled and can be tougher.
How Much to Buy?
A good rule of thumb is to calculate about 1 pound of bone-in prime rib per person, or about 0.75 pounds of boneless. Remember, it’s always better to have leftovers (hello, prime rib sandwiches!) than to run short.
Preparation is Key: Setting the Stage for Perfection
Once you have your magnificent prime rib, the preparation steps are crucial for the Chef John Prime Rib Recipe to truly shine. These aren’t just minor details; they’re foundational to achieving that perfect crust and juicy interior.
The Essential Dry Brine
Chef John is a big proponent of dry brining, and for good reason. This simple step makes a massive difference. About 24 to 48 hours before you plan to cook, generously salt your prime rib all over with kosher salt. Place it uncovered on a wire rack set over a baking sheet in your refrigerator.
Why dry brine? The salt draws moisture out of the meat, which then reabsorbs, carrying the salt deeper into the muscle fibers. This not only seasons the meat throughout but also helps break down proteins, leading to a more tender roast. Additionally, the uncovered exposure to the cold air dries out the surface, which is absolutely critical for developing that beautiful, crispy crust we all crave with the Chef John Prime Rib Recipe.

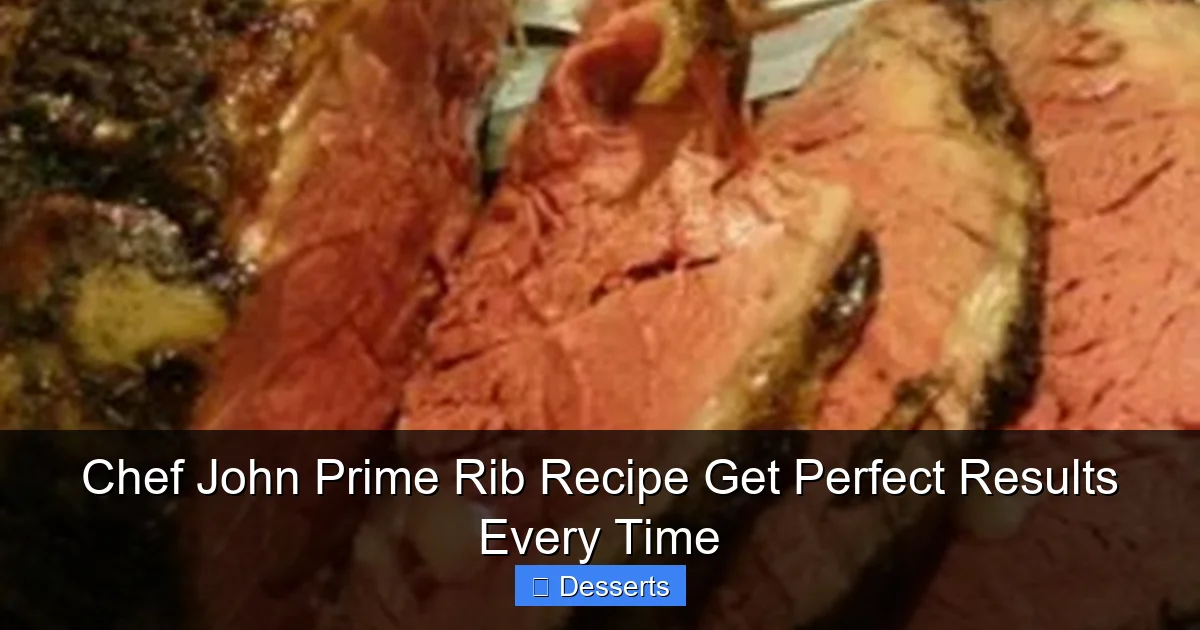
Visual guide about Chef John Prime Rib Recipe Get Perfect Results Every Time
Image source: allrecipes.com
Crafting Chef John’s Flavorful Rub
The rub for a prime rib should enhance, not overpower, the rich flavor of the beef. Chef John’s approach is wonderfully simple yet incredibly effective.
Ingredients:
- Fresh garlic (minced or pressed)
- Fresh rosemary (finely chopped)
- Fresh thyme (finely chopped)
- Black pepper (freshly ground is best)
- A touch of olive oil or Dijon mustard (as a binder, optional)
Mix these ingredients into a paste. On the day of cooking (after the dry brine), remove the prime rib from the fridge about 2-3 hours before you plan to cook it to allow it to come closer to room temperature. This promotes more even cooking. Pat the roast completely dry with paper towels, then generously slather the rub all over the prime rib. If you’re using a boneless roast, make sure to get some rub in any crevices created by tying. This aromatic rub is a signature element of the Chef John Prime Rib Recipe.
The Reverse Sear Method: Low and Slow Cooking
Now for the heart of the Chef John Prime Rib Recipe: the revolutionary reverse sear. This technique flips traditional roasting on its head and delivers unparalleled results.
Preheating Your Oven Correctly
Preheat your oven to a very low temperature, typically around 225-250°F (107-121°C). The exact temperature can vary slightly depending on your oven’s calibration. Use an oven thermometer to verify accuracy. Place your prime rib, fat side up, on a wire rack set inside a roasting pan. This setup allows for air circulation around the roast, which is crucial for even cooking and crust development.
Monitoring Internal Temperature: Your Best Friend
This is perhaps the most critical step in achieving perfect doneness. Invest in a good quality, leave-in probe thermometer that you can monitor from outside the oven. Insert the probe into the thickest part of the roast, avoiding bones.
Cook the prime rib until it reaches an internal temperature of about 120-125°F (49-52°C) for medium-rare. The cooking time will vary significantly based on the size and shape of your roast. A 5-pound roast might take 2-3 hours, while a 10-pound roast could take 4-5 hours or more. The “low and slow” approach is gentle, so don’t rush it. This is where the magic of the Chef John Prime Rib Recipe truly happens, ensuring tenderness.
The All-Important Rest
Once your prime rib reaches the target internal temperature, remove it from the oven. This next step is absolutely non-negotiable for the Chef John Prime Rib Recipe: REST. Tent the roast loosely with foil and let it rest on your countertop for a minimum of 30-45 minutes, or even longer for larger roasts (up to an hour).
Why rest? Resting allows the muscle fibers to relax and the juices to redistribute throughout the meat. If you carve too soon, all those delicious juices will spill out onto your cutting board, leaving you with a dry prime rib. During the rest, the internal temperature will also continue to rise by several degrees (this is called “carryover cooking”), so factor that into your initial target temperature. For medium-rare, aiming for 120-125°F before resting is perfect.
The Grand Finale: The High-Heat Sear
After the restful slumber, it’s time to bring on the heat and create that glorious, crispy crust that defines a perfectly cooked prime rib using the Chef John Prime Rib Recipe.
Blasting for the Crust
While your prime rib is resting, crank your oven up to its highest setting, usually 450-500°F (230-260°C). Once the oven is fully preheated, remove the foil from the rested prime rib and return it to the hot oven.
Sear the roast for about 10-15 minutes, or until the exterior is deeply browned and beautifully crispy. Keep a close eye on it during this phase; ovens vary, and you don’t want to burn that delicious crust. This high-heat blast finishes the Chef John Prime Rib Recipe with an unforgettable texture contrast.
Checking Final Doneness and Slicing
After the sear, you can do a final temperature check if you like, but if you followed the low-and-slow portion and rest correctly, your prime rib should be perfectly done. For medium-rare, the final temperature will likely be around 130-135°F (54-57°C).
Now for the moment of truth: carving!
- Bone-In: Carefully slice along the bones to remove the entire slab of meat. Then, slice the meat against the grain into desired thickness (usually 1/2 to 3/4 inch).
- Boneless: Simply slice against the grain.
Present your beautifully carved prime rib on a warm platter, ready to impress your eager diners. Every slice will showcase the even doneness achieved by the Chef John Prime Rib Recipe.
Troubleshooting and Tips for Prime Rib Perfection
Even with a foolproof method like the Chef John Prime Rib Recipe, a few tips can ensure absolute success and help you troubleshoot any minor hiccups.
Achieving Different Levels of Doneness
While medium-rare is often the preferred doneness for prime rib, here are target temperatures to remove from the oven (before resting and searing):
- Rare: 115-120°F (46-49°C)
- Medium-Rare: 120-125°F (49-52°C)
- Medium: 125-130°F (52-54°C)
- Medium-Well: 130-135°F (54-57°C)
Remember, these temperatures account for carryover cooking during the rest.
Making the Perfect Au Jus or Gravy
Don’t let those flavorful pan drippings go to waste! After removing the roast for its initial rest, deglaze the roasting pan with a bit of red wine, beef broth, or even water. Scrape up all the browned bits (fond) from the bottom of the pan. Strain the liquid, then reduce it slightly on the stovetop. You can thicken it with a cornstarch slurry for a simple gravy or serve it as a pure, rich au jus. This savory accompaniment perfectly complements the Chef John Prime Rib Recipe.
Leftovers and Reheating
Leftover prime rib is a treat! Store slices in an airtight container in the refrigerator for up to 3-4 days. To reheat without drying it out, gently warm slices in a low oven (around 250°F / 120°C) covered with foil, perhaps with a splash of beef broth. You can also pan-sear individual slices briefly for a quick reheat. And of course, prime rib sandwiches are legendary!
Don’t Crowd the Oven
If you’re cooking other dishes, try to avoid putting too many items in the oven with your prime rib during the low-and-slow phase. Consistent, even heat is crucial for the Chef John Prime Rib Recipe.
Conclusion: Master the Chef John Prime Rib Recipe
There you have it—a comprehensive guide to mastering the magnificent Chef John Prime Rib Recipe. From selecting the perfect cut to the transformative power of the reverse sear, every step is designed to deliver a prime rib that is incredibly tender, bursting with flavor, and boasting an irresistible crust. It’s a method that takes the guesswork out of cooking this impressive roast, allowing you to confidently create a truly show-stopping meal.
So, gather your ingredients, trust the process, and prepare to delight your taste buds and impress your guests. Whether it’s for a special occasion or just a luxurious Sunday dinner, the Chef John Prime Rib Recipe will ensure you achieve perfect results every time. Happy cooking, and enjoy the culinary triumph!
🎥 Related Video: How to Make Perfect Prime Rib | Food Wishes
📺 Food Wishes
Get ready to master the art of cooking the perfect prime rib with Chef John! This easy-to-follow recipe will guide you through …
Frequently Asked Questions
What temperature should my prime rib be for medium-rare after resting?
For a perfect medium-rare, your prime rib should reach an internal temperature of about 130-135°F (54-57°C) after resting. You’ll remove it from the oven for the initial rest when it’s around 120-125°F, allowing for carryover cooking.
Can I make Chef John Prime Rib Recipe boneless?
Absolutely! A boneless prime rib works beautifully with Chef John’s method. Just ensure it’s tied securely with butcher’s twine to help it maintain its shape and cook evenly.
Do I need any special equipment for this prime rib recipe?
The most crucial piece of equipment is a reliable, leave-in probe thermometer to accurately monitor the internal temperature. A sturdy roasting pan with a wire rack is also highly recommended for even heat circulation.
How can I make a good gravy or au jus from the pan drippings?
After removing the prime rib for its first rest, drain off excess fat from the roasting pan. Deglaze the pan with beef broth or red wine over medium heat, scraping up all the flavorful browned bits (fond). Simmer briefly, then strain for a simple au jus, or thicken with a cornstarch slurry for gravy.
What if my prime rib isn’t browning enough during the final sear?
Ensure your oven is truly at its highest temperature and fully preheated before putting the roast back in. If after 10-15 minutes it’s not browned enough, you can try moving it closer to the broiler element for a very short burst, but watch it constantly to prevent burning.
How far in advance can I dry brine the prime rib?
You can dry brine your prime rib for a minimum of 24 hours and up to 48 hours before cooking. The longer it brines, the deeper the seasoning will penetrate and the drier the surface will become, leading to a better crust.
geminichef.com is a participant in the Amazon Services LLC Associates Program, an affiliate advertising program. As an Amazon Associate, we earn from qualifying purchases made through our links.